Looking Back at Demolition
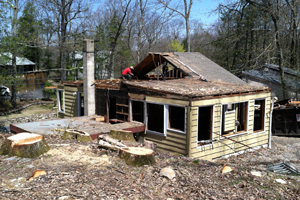
The project began with the demolition of the existing cottage. As a builder, I should be immune to feeling badly about taking down an old house, but I find it painful to see sound building materials smashed up and hauled away. However, the reality is that working with the existing framing would have cost more, and achieving air tightness would have been harder. One consolation is that 90% or more of the materials are recycled in some way. This is down-cycling, of course, as the materials in their current form have no market value.
Foundation and Framing
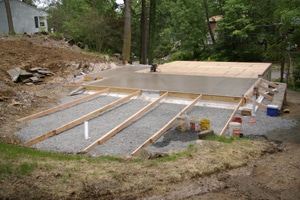
I kept only the concrete block foundation and the framed floor above it. In retrospect, I doubt that I should have kept either. The block foundation was never waterproofed and has no footing drain so it will always be somewhat damp. This led to a damp floor deck above during construction which required care to prevent mold. Also, the floor framing wasn’t completely square and was structurally insufficient without reinforcement. Bottom line is that it would have been easier, and perhaps even cheaper, just to have started from scratch.
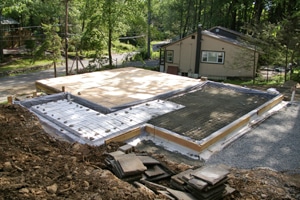
I expanded the footprint of the house to the rear and side of the old foundation. I chose to go with a frost-protected shallow foundation. Unlike traditional foundations, this type does not require footings down 42” to frost depth. The installation began with a 6” layer of crushed stone, followed by a 12” layer of EPS rigid foam insulation (EPS=expanded polystyrene), with short EPS stem walls around the perimeter, forming a shallow basin that is filled with concrete. The EPS isolates the concrete from the ground and the outside air, which prevents “thermal bridging” (heat loss through structural materials that don’t insulate well, like concrete). The addition was then framed directly above the concrete slab. The insulation not only prevents heat loss to the ground, but also heat loss from the ground – which is 50-55 degrees year round – to the ambient air. That’s why traditional footings down 42” aren’t required.
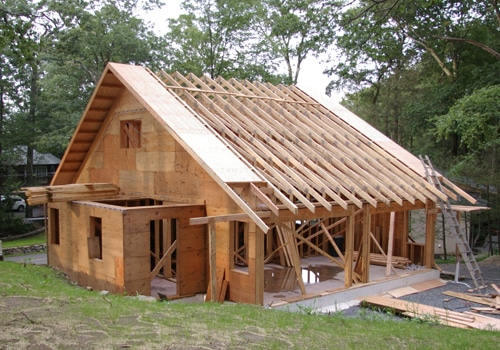
The walls were framed with 2×6 studs to create 5-1/2” cavities for insulation. The studs are spaced 24” apart, instead of the normal 16”. This wider spacing means that there is less wood and more insulation in the wall assembly. The roof is framed with engineered trusses, which are structural wood assemblies manufactured off-site. The rear roof trusses are 18” tall and filled with insulation. The spaces between the top and bottom wood members of the trusses are filled with insulation which reduces thermal bridging. The attic is also framed with trusses. These have “raised heels”, to provide ample space for insulation directly over the outside walls, which eliminates the principal cause of ice dams.